I wanted my phone call to be when your Mum or Dad call (usually mum) and the just keep talking even when your are saying bye, they just carry on. You are on the other end wanting for them to come off.
Compilation of reference videos -
Reference Video I am using -
https://vimeo.com/158216555
Up to 3 Seconds of it -
I haven't animated the eyebrows or mouth yet.
Key framed -
https://vimeo.com/158216647
With Auto -
https://vimeo.com/158216658
Only eyes and body finished - I find it easier when doing the face to do part by part, so I started off by getting the body and the eyes key framed in the right place and making sure the timing was correct. next I will start to move the eyebrows and the mouth.
Key Framed -
https://vimeo.com/158221459
Auto -
https://vimeo.com/158221458
I am very please with the result so far even if the whole face has not been done. I feel I am getting better at key framing and using my reference videos correctly to get the correct timings of things.
Wednesday, 9 March 2016

Tuesday, 8 March 2016
3D Production - Motion Capture
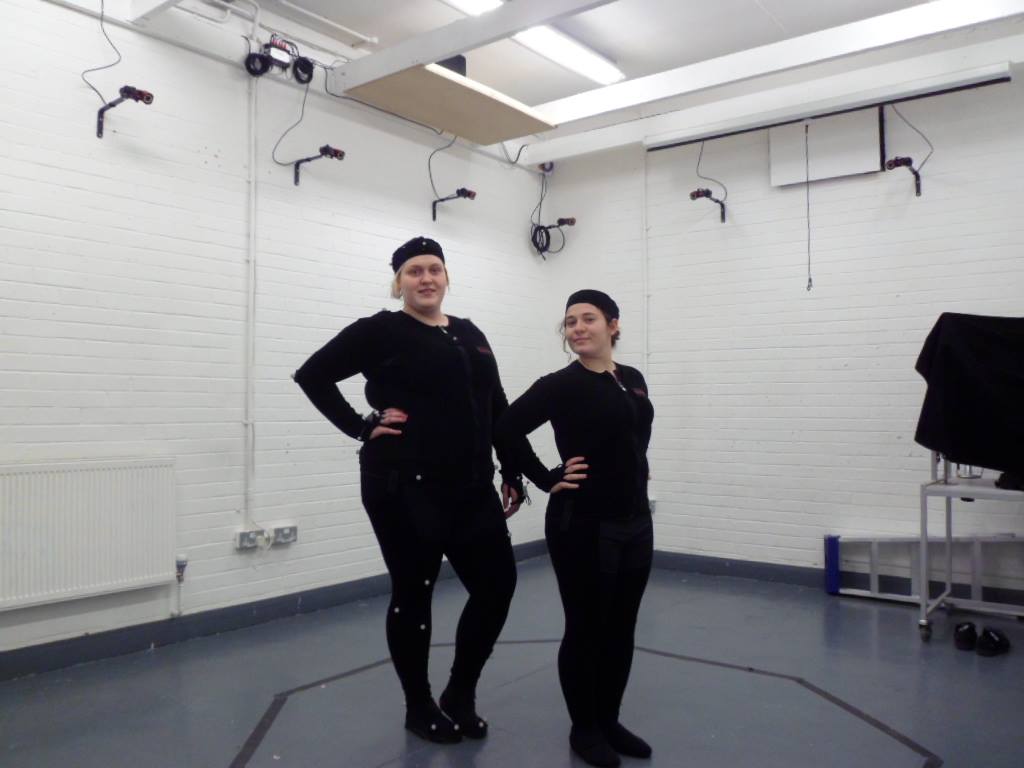
Me and Bethany had a go in the motion capture room this week. Unfortunately we do not know how to show the work we did, but it was a great leaning experience.
This is some of the pictures we took in the suite


This is some of the pictures we took in the suite


Monday, 7 March 2016
3D Production - Redone Shock Reaction
After the feedback I wanted to redo my shock from cratch. I hadn't followed my reference and although I had key posed it I had not done it properly. It was also all the same speed and I wanted to redo it.
Reference video I have based it off -
I used the same reference video as I feel it has a lot of personality and although it isn't a typical shock, it still portrays what I want it too.
https://vimeo.com/158156511
Key poses -
https://vimeo.com/158156582
With Auto finished -
https://vimeo.com/158156630
I feel this is much better than before, the timing I feel it better and it shows the emotion as well. The feedback I got for this that I need to push the body more and try and get it more live the reference video. I chose to not add the hand bounce on the table but Emily thinks I should try it, so I will also add that for next time.
Reference video I have based it off -
I used the same reference video as I feel it has a lot of personality and although it isn't a typical shock, it still portrays what I want it too.
https://vimeo.com/158156511
Key poses -
https://vimeo.com/158156582
With Auto finished -
https://vimeo.com/158156630
I feel this is much better than before, the timing I feel it better and it shows the emotion as well. The feedback I got for this that I need to push the body more and try and get it more live the reference video. I chose to not add the hand bounce on the table but Emily thinks I should try it, so I will also add that for next time.
Saturday, 5 March 2016
Creative Compositing - Week 5 - Particles in After Effects
In this lesson we were to present our research and tests to Isaiah as he came round to us. Before that we looked at how we could use particles to make stock footage fire look more realistic against a background.
To start we were given the fire footage which we key lighted and masked around it so we could feather out the edges, so it blended with the background.
We then created a solid layer on top of it and added the particle playground (effects - simulation - particle playground). The particle started off falling downwards so we had to change the gravity of them so they would float upwards. We also changed the radius so they were spread out more. We next duplicated the layer and changed the colour of it and off-set it so it gave a better effect to the fire.
Fire Particles Test:
https://vimeo.com/157740619
Helpful Videos:
https://www.youtube.com/watch?v=6EO54MDIcBU - this video showed a different way of using the particles which looks very effective
https://www.youtube.com/watch?v=sLgoCEHN-64 - this was also cool at showing how to make particle follow something
Friday, 4 March 2016
Creative Compositing - Proposal and Tests
Test this week
After we had learnt how to use the green screen I thought about whether or not I could use it for my project. I hadn't quite figured out how I would do the camera sequence and so I though I could test it out using the green screen.
This is the green screen footage I shot. I will use a section of this for my test.
https://vimeo.com/157725651
Test using the green screen footage and adding it too the test I did last week:
https://vimeo.com/157577014
I know for next time that I need to take the footage from a different angle so you can see the camera screen better and also to make sure there is light shining on the camera so you can see it better. Next time I will make sure I do this.
I also have noticed when you look through the camera the size of the image changes on the screen and in my test I have not done this and so I need to look at how to create this.
My Proposal:
My project will start off with someone looking like they are about to take a picture of a church. As they pan up the church the camera will cut to the screen on the camera where gargoyles will start to appear and move. In shock the camera will then drop to reveal that they are not present unless you are looking through the camera.
Inspiration
For my project I will be creating a 15-30 second film about looking through a camera and then seeing creatures move. I got inspiration for my piece from Guilherme Marcondes's animations as they use live action with animation over the top.
http://www.guilherme.tv/caveirao
I also took inspiration from Elton John - Wonderful Crazy Night Album Advert
https://www.youtube.com/watch?v=ntRQBy415M8

This is quick storyboard I did to help me see what would happen. The camera will look up, the gargoyles will appear and then the camera will come down to reveal no gargoyles.
Next Step:
What I need to look at next is lighting and where the light will be coming from and then this will give my piece more depth because at the moment it is very flat.
I also need to start to animated the gargoyle/ gargoyles and decide what they will do.
After we had learnt how to use the green screen I thought about whether or not I could use it for my project. I hadn't quite figured out how I would do the camera sequence and so I though I could test it out using the green screen.
This is the green screen footage I shot. I will use a section of this for my test.
https://vimeo.com/157725651
Test using the green screen footage and adding it too the test I did last week:
https://vimeo.com/157577014
I know for next time that I need to take the footage from a different angle so you can see the camera screen better and also to make sure there is light shining on the camera so you can see it better. Next time I will make sure I do this.
I also have noticed when you look through the camera the size of the image changes on the screen and in my test I have not done this and so I need to look at how to create this.
My Proposal:
My project will start off with someone looking like they are about to take a picture of a church. As they pan up the church the camera will cut to the screen on the camera where gargoyles will start to appear and move. In shock the camera will then drop to reveal that they are not present unless you are looking through the camera.
Inspiration
For my project I will be creating a 15-30 second film about looking through a camera and then seeing creatures move. I got inspiration for my piece from Guilherme Marcondes's animations as they use live action with animation over the top.
http://www.guilherme.tv/caveirao
I also took inspiration from Elton John - Wonderful Crazy Night Album Advert
https://www.youtube.com/watch?v=ntRQBy415M8
I like how through the advert you were looking through a pair of glass and then could see the animation appear and I wanted to do something similar in my project.
Breakdown
Background - My background will be stormy clouds, that will move. I will creating this by filming clouds (approximately 5 mins) and then speeding them up slightly to create the effect. I will also have to change the colour of them to black and white to get the stormy, miserable, dark affect.
Still Image - This will be the picture of St Peter's Church in Wolverhampton city center. I will be taking these pictures myself and the changing the colour of it to match the style. I have already taken some stills of the church which i have put on earlier posts. I did this to test angles of the church.
Live Action - My live action will be me holding a camera and moving it up towards the top of the church. I will do this on green screen. I have tested this on a different post.
Animation - My last layer will be my animation layer which will be when it looks at the camera screen and then gargoyles will start to appear and move. I will be using TVpaint for this and then compiling it in After effects. I want to animation to look like animation on purpose and not to blend in with the rest of the composition as i feel it will stand out better and as they aren't real I felt doing it like this would be better.
There are Sketches of the types of gargoyles I would like to use in the animation on another blog post.

Next Step:
What I need to look at next is lighting and where the light will be coming from and then this will give my piece more depth because at the moment it is very flat.
I also need to start to animated the gargoyle/ gargoyles and decide what they will do.
Wednesday, 2 March 2016
3D Production - Week 5 - Facial Animation and Animation Layers
“The Eyes are the window to your soul” Shakespeare
So if the eyes are dead the soul is dead, mastering the eyes in
animation will add so much humanity to your character.
The link below shows the latest technology for games and how
they are animating character to be more lifelike by using motion capture. It is
really fascinating to see how they have done this. http://www.youtube.com/watch?v=ZY7RYCsE9KQ
Test animation on
3Lateral FACS based rig with contextual shapes.
To
get the best facial expressions and emotions you need to plan and make sure to
notice things that people do when they react to certain things. Then try and
capture that into the animation. The easiest way to do it is to plan and look
at the reference footage and thumbnails.
Blinking Tutorial: https://vimeo.com/50135405
Blinking guidelines:
· Keep eyes closed for at least 2 frames
· Top lid come down 80%, bottom lids come up by 20 %.
· Eyes role up slightly when we blink.
· Other things move round the eyes. (Eyebrows, cheeks etc.)
· Often close slow and open faster (slow in fast out)
Eye Darts:
Consider what makes us change the direction of our eyes and
the impact it has on the person watching us. I need to make sure I focus on the
eyes.
Working with animation layers, man push box with different
layers for various body parts: https://www.youtube.com/watch?v=HFfyCUV7nz8
Class tasks
As a class we got
into pairs, one would react to certain things (ask them to
remember something, imagine something, think of something they love, think of
something they hate) and the other would write notes on what they did.
Remembering something-
looking down, eye darts – side to side, staring
Imagine something –
looking up, eye darts, slight smile
Love – smile and
eye quint (smiling with whole face), looking up
Hate – eyebrow twitch,
eyes darting – up and down, lots of blinking.
Our next task and
Homework was to think of a phone call reaction without talking. Reacting to
something someone is saying on the phone. I will blog this on a separate post.
Tuesday, 1 March 2016
Critical and Contextual Issues - Week 5 - Tutorial
This week we had a tutorial with Russ to discuss the our plans for our essays (which I have posted on a previous post).
The feedback I got was good, he liked my title and the way I had structured it and what interested to see what statistics I would find and what information about the specific women I would find.
I am very happy with how it went and I feel confident now to start drafting my essay.
My Essay Intro
^Above is my essay introduction. I have reworded certain areas to include what my I had written in my plan and I feel it makes a lot more sense now.
The feedback I got was good, he liked my title and the way I had structured it and what interested to see what statistics I would find and what information about the specific women I would find.
I am very happy with how it went and I feel confident now to start drafting my essay.
My Essay Intro
This essay will aim to discuss the animation industry and
how women’s roles have changed over the years. Exploring how the change in
times and how society viewed women all those years ago will allow me to see how
it affected what roles women were given in the industry.
Looking at and comparing different women working in the
industry will also give me a better understanding of this element to my essay,
including relevant case studies that will back up my findings. The focus on
women who worked in the animation companies and not women who were freelance
animators will be vital to the relevance of this essay. An example is Lotte
Reiniger who worked for herself and was a big name in the female world.
This essay will also compare how their roles have evolved between
then and now, such as the contrast between back then, where they could only
paint and outline cells, to now where it could be argued that they are seen as
equals. It will also discuss whether or not the social norms of the time and
idealisms had an impact on the roles women could have, as well as discussing
the differences in times and whether it has changed significantly or only
slightly and why this is.
^Above is my essay introduction. I have reworded certain areas to include what my I had written in my plan and I feel it makes a lot more sense now.
Subscribe to:
Posts (Atom)